

This article is the payoff of the "for beginners" promise: a complete, working script you can read line by line, understand, and adapt to your own models — built and explained in roughly ten minutes' worth of material.
The scenario. The example script performs seven common setup tasks in sequence:
- Rename an object in the tree
- Change a material
- Mesh the model
- Insert a Fixed Support
- Insert a Total Deformation result
- Solve the solution
- Save the results to a file
The deck supplies the supporting files for this exercise — a starting model and the finished script — and encourages you to compare the "before" and "after" tree structures to spot exactly what the script changed.
📎 Files for this article:
Model1.wbpz·Model1_Hello_Mechanical.py
Note: Model was created in 26R1
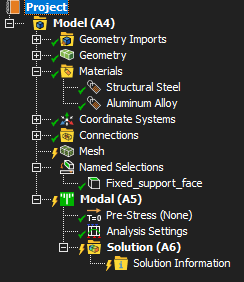
"Spot the differences!" — here's the tree before the script runs:
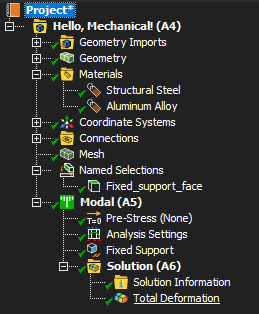
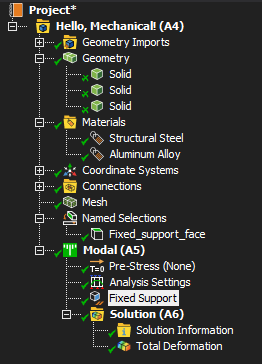
...and here's the tree afterward:
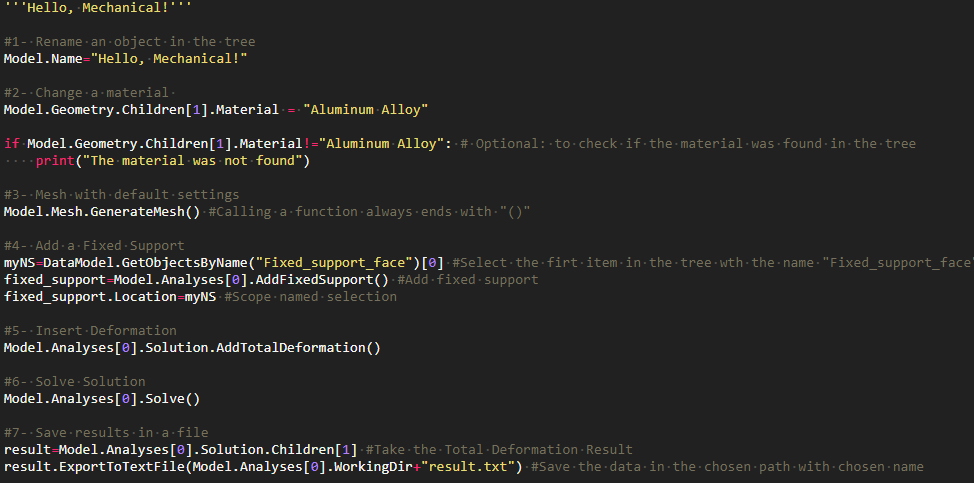
Here is the complete script, exactly as provided:
'''Hello, Mechanical!'''
#1- Rename an object in the tree
Model.Name="Hello, Mechanical!"
#2- Change a material
Model.Geometry.Children[1].Material = "Aluminum Alloy"
if Model.Geometry.Children[1].Material!="Aluminum Alloy": # Optional: to check if the material was found in the tree
    print("The material was not found")
#3- Mesh with default settings
Model.Mesh.GenerateMesh() #Calling a function always ends with "()"
#4- Add a Fixed Support
myNS=DataModel.GetObjectsByName("Fixed_support_face")[0] #Select the first item in the tree with the name "Fixed_support_face"
fixed_support=Model.Analyses[0].AddFixedSupport() #Add fixed support
fixed_support.Location=myNS #Scope named selection
#5- Insert Deformation
Model.Analyses[0].Solution.AddTotalDeformation()
#6- Solve Solution
Model.Analyses[0].Solve()
#7- Save results in a file
result=Model.Analyses[0].Solution.Children[1] #Take the Total Deformation Result
result.ExportToTextFile(Model.Analyses[0].WorkingDir+"result.txt") #Save the data in the chosen path with chosen name
Now let's walk through it step by step.
Step 1 — Rename an object. The general model name is accessed through Model, and renamed simply by assigning a new value to its .Name property. This is about as gentle an introduction to the Mechanical API as you can get: you're reading an object from the tree and writing a new value to one of its properties.
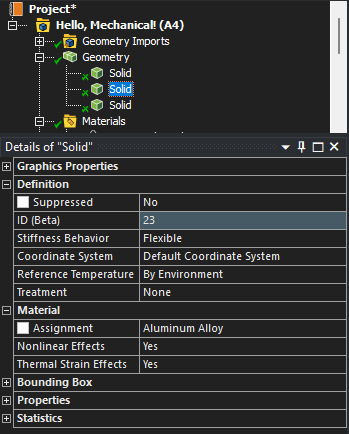
Step 2 — Change a material. Materials live under the Geometry branch of the tree. Model.Geometry gets you into Geometry, and .Children[1] selects the second child underneath it (indexing starts at 0), whose material you then assign directly. The script also includes an optional safety check — if the material name wasn't recognized and applied, it prints a warning rather than failing silently.
Notice the pattern here — it will repeat throughout: navigate down through the tree using dotted properties and Children[index], then either read or set a property on whatever you land on.
Step 3 — Mesh. The Mesh object is reached with Model.Mesh, and generating the mesh with default settings is a single function call: Model.Mesh.GenerateMesh().
Step 4 — Insert a Fixed Support. This step is a little more involved, because it needs to reference a face by name rather than by tree position. First, the script looks up the Named Selection for the face by name using DataModel.GetObjectsByName, which returns a list — so [0] grabs the first (and here, only) match. Then a Fixed Support is added under the first analysis in the tree (Model.Analyses[0] — for this model, that's the Modal analysis) using AddFixedSupport(), and its location is scoped to the Named Selection just found.
Step 5 — Insert Total Deformation. Results live under Solution, which you reach via Model.Analyses[0].Solution. Adding a Total Deformation result is another one-line function call: AddTotalDeformation().
Step 6 — Solve. Solving the analysis just needs the Solve() function called on that same analysis object: Model.Analyses[0].Solve().
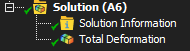
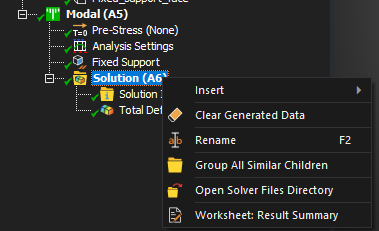
Step 7 — Export the results. Finally, the script grabs the Total Deformation object — which, in this tree, is the second child under Solution — assigns it to a variable called result, and exports it to a text file. ExportToTextFile needs a full file path, so the script builds one from WorkingDir (the Solver Files Directory for this analysis) plus the desired filename.
Put together, the whole script is visibly compact — and yet it replaces renaming, material assignment, meshing, boundary condition setup, result insertion, solving, and exporting, all of which would otherwise be a couple of dozen manual clicks. That's the entire pitch of scripting in a nutshell, demonstrated rather than just described. Once this pattern — navigate the tree, then call a function or set a property — clicks for you, the rest of the deck is really just extending it to more tree objects and more use cases.